Armour Tubeless Installation Instructions
Printable InstructionsNOTE! TANNUS ARMOUR TUBELESS INSERTS ARE FOR TUBELESS TIRES AND RIMS ONLY.


Armour Tubeless Install Tips
SEALANT: To save time you can pour sealant in the tire before pushing the second bead of the tire over the rim in step 4. If you do please skip step 5.
TOOLS: If you're struggling to get the second bead over the rim use tire levers or ask a friend for a hand.
VALVE CORE: Be sure to remove the valve core before filling with sealant and replace once the sealant is applied.
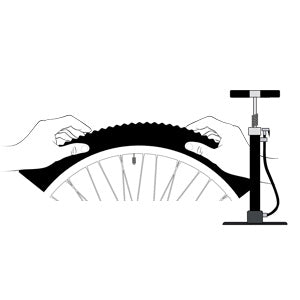
INFLATION: When inflating the tire a simple bicycle floor pump is all that is needed. However, if you're having a difficult time getting the bead to set try using an air compressor.
Troubleshooting
There are several things that can cause a tubeless system to leak, and no exceptions with Armour Tubeless. Here are the main things to check:
• The rim tape - Check for holes in the tape, this is the main reason for leaking tubeless.
• Loose valve - Make sure the valve is tight and air cannot escape through the sides of the valve.
• Hole in the tire - check to make sure there are no holes in your tubeless tires. This will be evident if you hear/see air or sealant leaking out of the tire.
• Sealant has dried up - You'll have to pull the tire off for this one, but sealant needs to be replaced in any tubeless system every 4-6 months.